TIM定时器 介绍 定时器是单片机内部集成,可以通过编程控制。单片机的定时功能是通过计数来实现的,当单片机每一个机器周期产生一个脉冲时,计数器就加一。定时器的主要功能是用来计时,时间到达之后可以产生中断,提醒计时时间到,然后可以在中断函数中去执行功能。比如我们想让一个 led 灯 1 秒钟翻转一次,就可以使用定时器配置为 1 秒钟触发中断,然后在中断函数中执行 led 翻转的程序。
执行定时任务:定时器的最常见的使用场景就是执行定时任务。例如,如果你希望每隔一定的时间,如 500 毫秒,执行某个特定的任务,那么你可以使用定时器来实现这种需求。
时间测量:定时器也可以用于测量时间,例如,你可以使用定时器来测量某个代码段的执行时间或者测量某个事件发生的间隔时间。
精确延时:定时器也可用于产生精确的延时。例如,如果你需要一个精确到微秒级的延时,你可以使用定时器来实现这种延时。
PWM 信号生成:通过定时器,你还可以实现生成 PWM(脉宽调制)信号,该信号可用于驱动电机或者调节 LED 的亮度等。
事件触发:很多时候我们需要通过定时器 trigger一些事件,如中断。此外,定时器还用于 watch dog(看门狗)的实现,用于监控或者复位系统。
硬件定时器和软件定时器 定时器可以基于硬件也可以基于软件实现,两者有各自的特点和适用场景:
硬件定时器是由微控制器硬件提供的定时功能,由专门的计时/计数器电路实现。硬件定时器的最大优势在于精确度高和可靠性强,因为它们不受软件任务和操作系统调度的影响。当需要非常精确的定时功能,如产生PWM信号或者获取精确的时间测量时,硬件定时器是首选。由于定时操作由硬件直接完成,即使主CPU忙于其他任务,定时器仍然可以在预定时间到达时准确地执行回调操作。
软件定时器是由操作系统或者软件库实现的定时器,它们利用操作系统提供的机制来模拟定时器功能。软件定时器的实现受到当前系统负载和任务调度策略的影响,因此相对来说不如硬件定时器精确。但是软件定时器通常更灵活,可以创建大量的定时器,适用于不需要精确时间控制的场合。
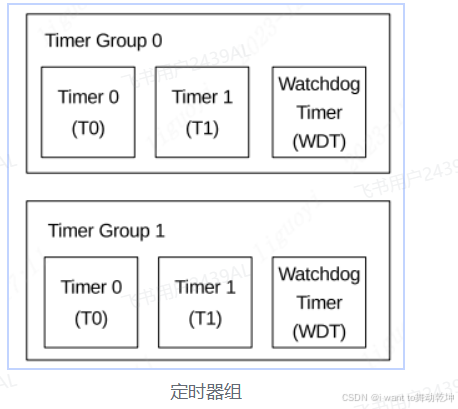
硬件定时器基本参数 ESP32芯片具有两个通用定时器组,每个定时器组包含两个通用定时器,例如 Timer0、Timer1 等,每个定时器都包含多个通道。可以通过指定定时器号和通道号来选择具体使用的定时器和通道。每个定时器都可以单独地进行编程,并且每个定时器可以以微秒精度产生基于时间的中断。基本的定时器参数包括:定时器号、通道号、预分频器、自动重新加载值、定时器中断使能等。
以下是一些基本概念和定时器的共有属性:
计时器(Counter): 定时器的核心组件,负责持续计数。
定时器溢出(Overflow): 当计数器达到其最大值然后归零时发生。
预置值(Preset Value): 计数器达到该值时会产生中断或其它事件。
分频器(Prescaler): 用于减小计数器接收的时钟信号频率,以延长定时器的最大计时范围。
中断(Interrupt): 当定时器达到预置值时,可以配置它来产生一个中断,中断处理程序将执行一些任务。
硬件定时器的操作流程 导入头文件
ESP-IDF(ESP32的官方开发框架)提供了一套 API 来配置和控制定时器。要使用 ESP32 定时器功能,首先需要在代码中包含必要的头文件,例如:
1 #include "driver/gptimer.h"
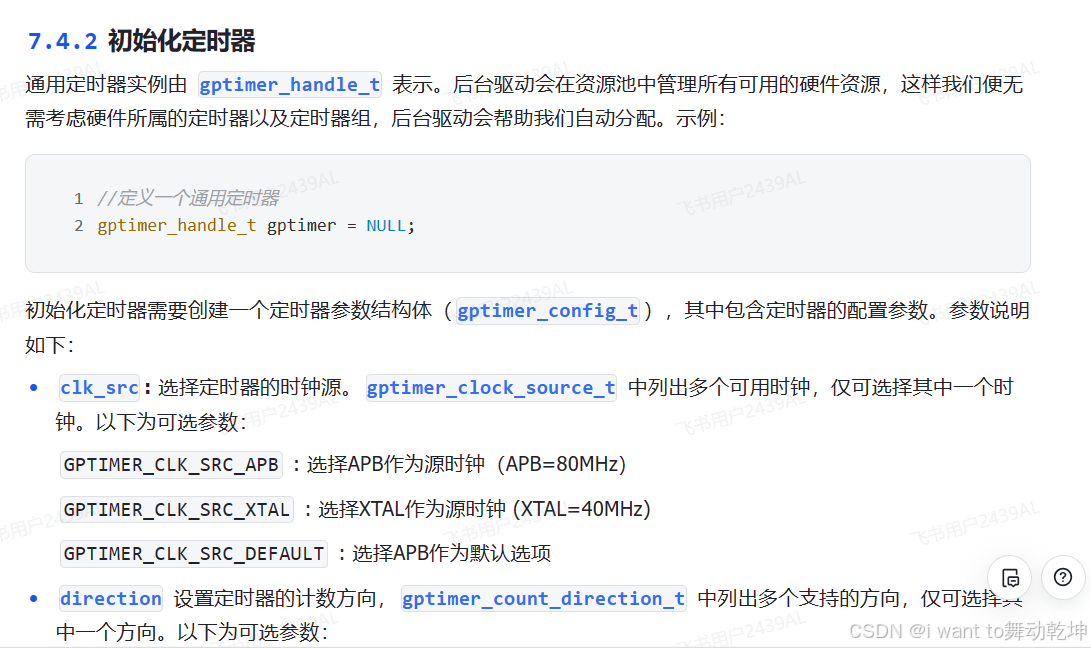
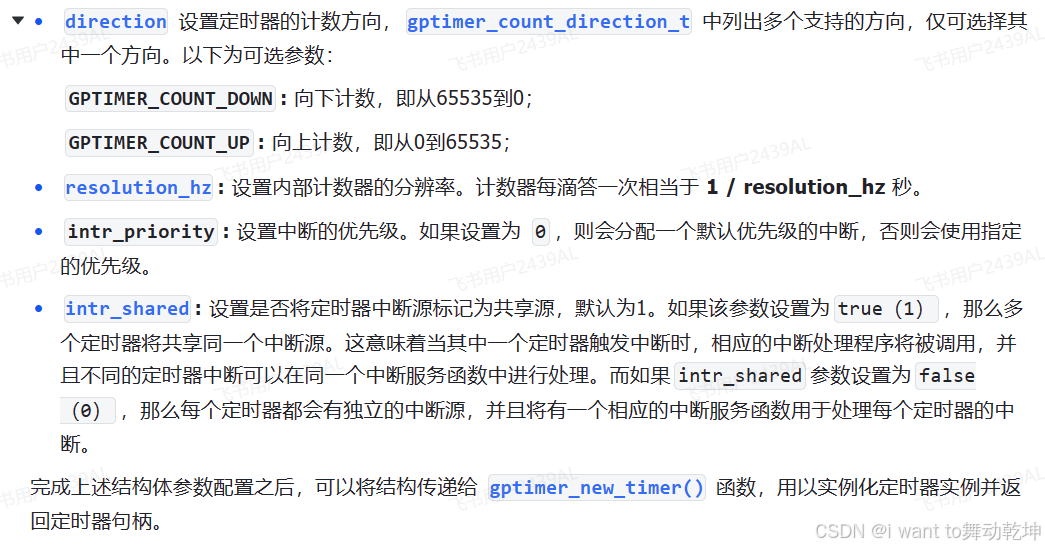
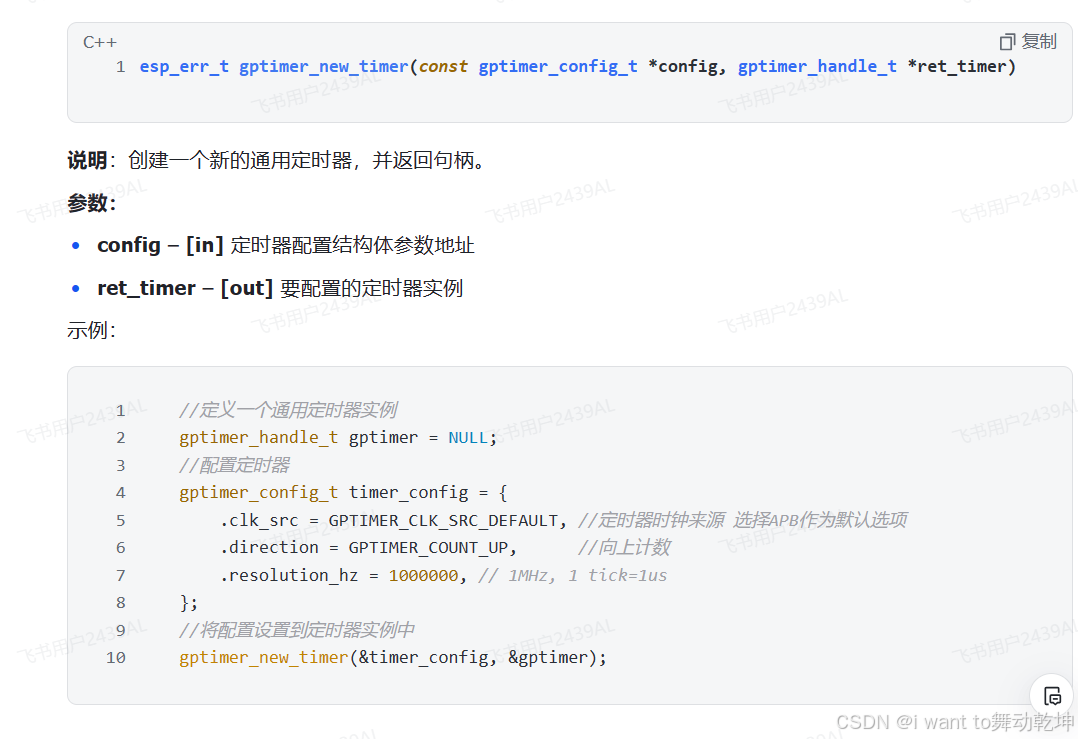
初始化硬件定时器 1 2 3 4 5 6 7 8 9 10 11 gptimer_handle_t gptimer = NULL ;gptimer_config_t timer_config = { .clk_src = GPTIMER_CLK_SRC_DEFAULT, .direction = GPTIMER_COUNT_UP, .resolution_hz = 1000000 , }; gptimer_new_timer(&timer_config, &gptimer);
做完上面的准备工作之后,按照STM32中的流程,我们应该要写中断函数了吧。
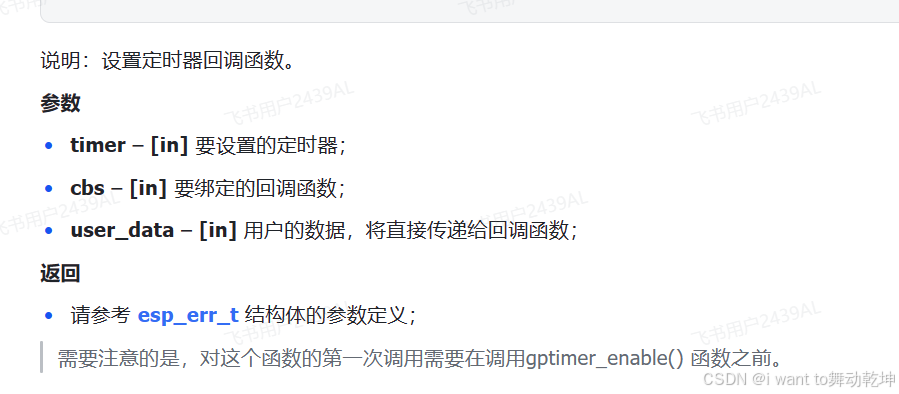
在ESP32中,我们换了个叫法,我们叫警报。所以流程就是配置定时器,然后配置警报,接着绑定警报的回调函数,这个回调函数可以理解成就是STM32中的中断函数。
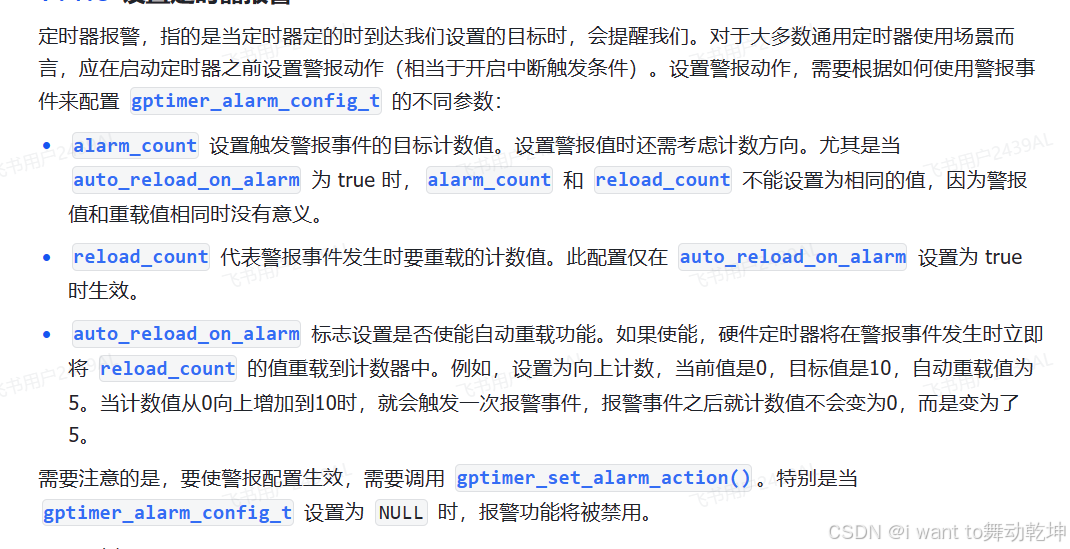
设置报警 一共需要配置的结构体成员有三个。
第一个设置触发警报事件的目标计数值,也就是当计数器的值到达这个目标值的时候触发警报。
第二个设置重装载的值,一般咱就选择重装成0,然后计数模式是向上计数。
第三个选择是否自动重载,也就是说我们是否要这个定时器警报周期性的给我们警报。
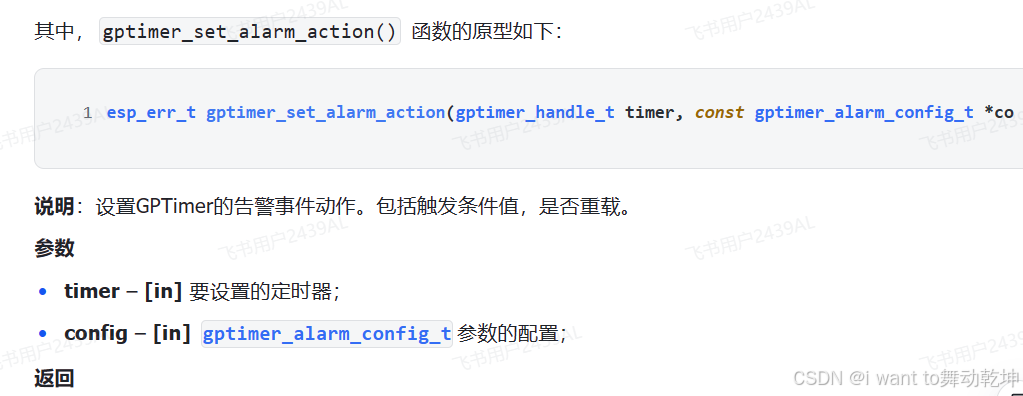
给结构体的成员配置完之后,还需要使用gptimer_set_alarm_action这个函数去激活,第一个参数是定时器的句柄,第二个参数是上面配置好的结构体变量的地址。
1 2 esp_err_t gptimer_set_alarm_action (gptimer_handle_t timer, const gptimer_alarm_config_t *config)
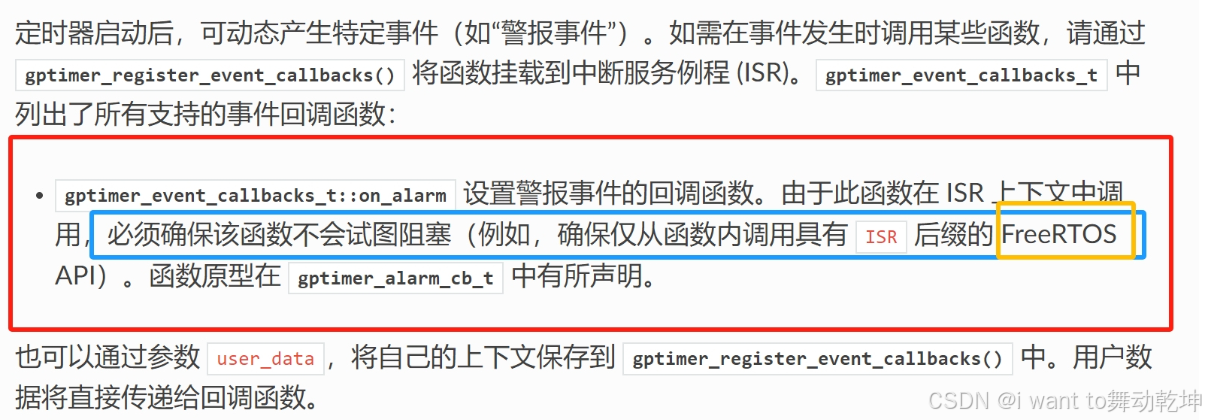
但注意 :这个下方框住的部分可以看出,函数必须确保这个函数不会试图阻塞,甚至是使用FreeRTOS的API。
没错,ESP-IDF给我们自带了FreeRTOS的API
使能和禁用定时器 在对定时器进行控制之前,需要先调用 gptimer_enable() 使能定时器。此函数功能如下:
1 2 esp_err_t gptimer_enable (gptimer_handle_t timer)
此函数将把定时器驱动程序的状态从 初始化 切换为 使能状态。
如果 gptimer_register_event_callbacks() 已经延迟安装回调服务函数,此函数将使能回调服务函数。
调用 gptimer_disable() 会进行相反的操作,即将定时器驱动程序恢复到 初始化 状态,禁用回调服务并释放定时器。
启动和停止定时器 我们使能了定时器之后,并没有代表定时器已经开始运行,还需要通过调用 gptimer_start() 函数使内部计数器开始工作。而 gptimer_stop() 可以使计数器停止工作。
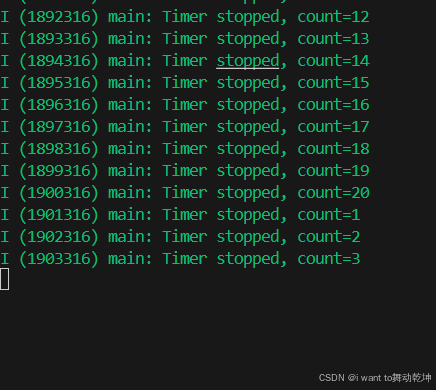
硬件定时器驱动代码 实现功能:每1s打印一次number的值,number计数至20归零重新计数myTimer.c
1 2 3 4 5 6 7 8 9 10 11 12 13 14 15 16 17 18 19 20 21 22 23 24 25 26 27 28 29 30 31 32 33 34 35 36 37 38 39 40 41 42 43 44 45 46 47 48 49 50 51 52 53 54 55 56 57 58 59 60 61 62 63 64 65 66 67 68 69 70 71 72 73 74 75 76 77 78 #include "myTimer.h" static bool IRAM_ATTR myTimer_Callback (gptimer_handle_t timer, const gptimer_alarm_event_data_t *edata, void *user_data) BaseType_t high_task_awoken = pdFALSE; QueueHandle_t queue = (QueueHandle_t)user_data; static int time = 0 ; time %= 20 ; time++; xQueueSendFromISR(queue , &time, &high_task_awoken); return high_task_awoken == pdTRUE; } QueueHandle_t myTimer_Init (uint32_t resolution_hz, uint64_t alarm_count) { gptimer_handle_t gptimer_handle = NULL ; QueueHandle_t queue = xQueueCreate(10 , sizeof (int )); if (!queue ) { ESP_LOGE("queue" , "Creating queue failed" ); return NULL ; } gptimer_config_t gptimer_config = { .clk_src = GPTIMER_CLK_SRC_DEFAULT, .direction = GPTIMER_COUNT_UP, .resolution_hz = resolution_hz }; ESP_ERROR_CHECK(gptimer_new_timer(&gptimer_config, &gptimer_handle)); gptimer_alarm_config_t gptimer_alarm_config = { .alarm_count = alarm_count, .flags.auto_reload_on_alarm = true , .reload_count = 0 }; ESP_ERROR_CHECK(gptimer_set_alarm_action(gptimer_handle, &gptimer_alarm_config)); gptimer_event_callbacks_t ecallbacks = { .on_alarm = myTimer_Callback }; ESP_ERROR_CHECK(gptimer_register_event_callbacks(gptimer_handle, &ecallbacks, queue )); ESP_ERROR_CHECK(gptimer_enable(gptimer_handle)); ESP_ERROR_CHECK(gptimer_start(gptimer_handle)); return queue ; }
myTimer.h
1 2 3 4 5 6 7 8 9 10 11 12 #ifndef _myTimer__H #define _myTimer__H #include "freertos/FreeRTOS.h" #include "freertos/task.h" #include <driver/gpio.h> #include <driver/gptimer.h> #include "esp_log.h" #include "freertos/queue.h" QueueHandle_t myTimer_Init (uint32_t resolution_hz, uint64_t alarm_count) ;#endif
main.c
1 2 3 4 5 6 7 8 9 10 11 12 13 14 15 16 17 18 19 20 21 22 23 24 25 26 27 28 29 30 #include <stdio.h> #include "myTimer.h" #include "freertos/FreeRTOS.h" #include "freertos/task.h" #include "esp_log.h" static const char *TAG = "main" ;void app_main (void ) int number = 0 ,countValue=0 ; QueueHandle_t queue = 0 ; queue = myTimer_Init(1e6 ,1e6 ); while (1 ) { if (xQueueReceive(queue , &number, pdMS_TO_TICKS(2000 ))) { ESP_LOGI(TAG, "Timer stopped, count=%d" , number); } else { ESP_LOGW(TAG, "Missed one count event" ); } } }
调试 软件定时器 上面介绍的通用定时器实际上是硬件定时器,所以相对的,我们能用的还有软件定时器。
软件定时器就是系统模拟出来的定时器,而通用定时器是实实在在有的硬件定时器,因此硬件定时器的精度会更高,而软件定时器使用起来可以有很多个,并且代码编写方面也比较简单,但是相对的,精度会略微下降。
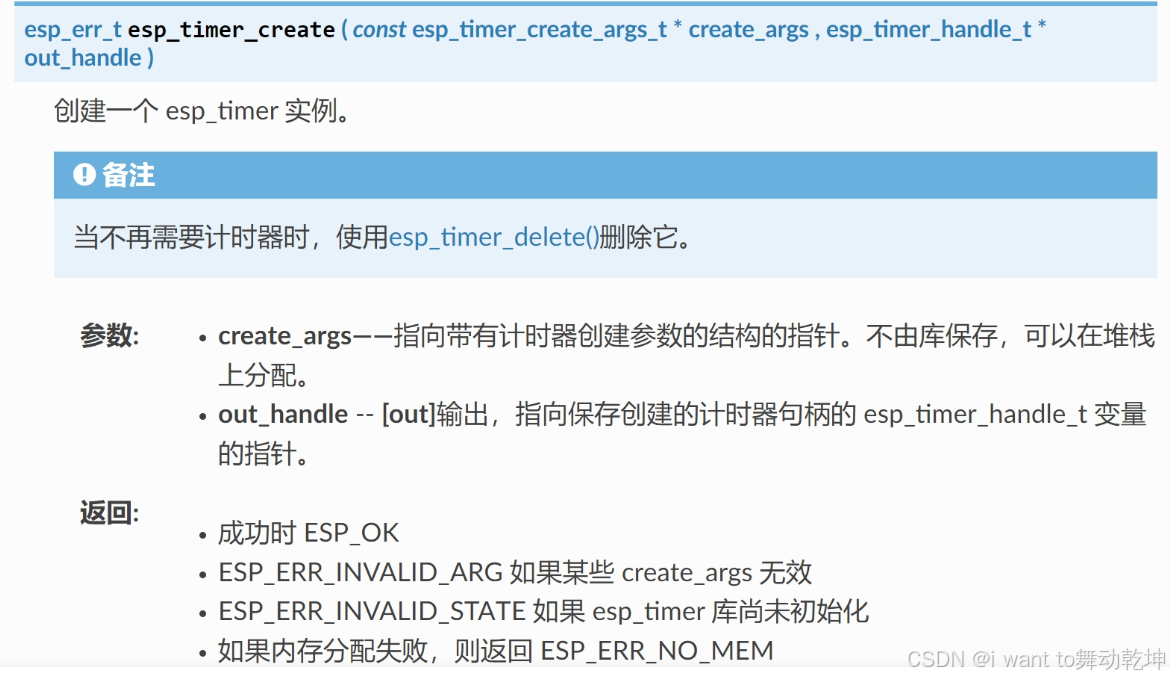
使用软件定时器 使用软件定时器首先需要包含头文件。
1 2 3 4 5 6 7 8 9 esp_timer_handle_t timer1=0 ; esp_timer_create_args_t timer1_arg = { .callback = &timer1Callback, .arg = NULL }; esp_timer_create(&timer1_arg , &timer1);
配置好了的定时器的句柄之后可以启动
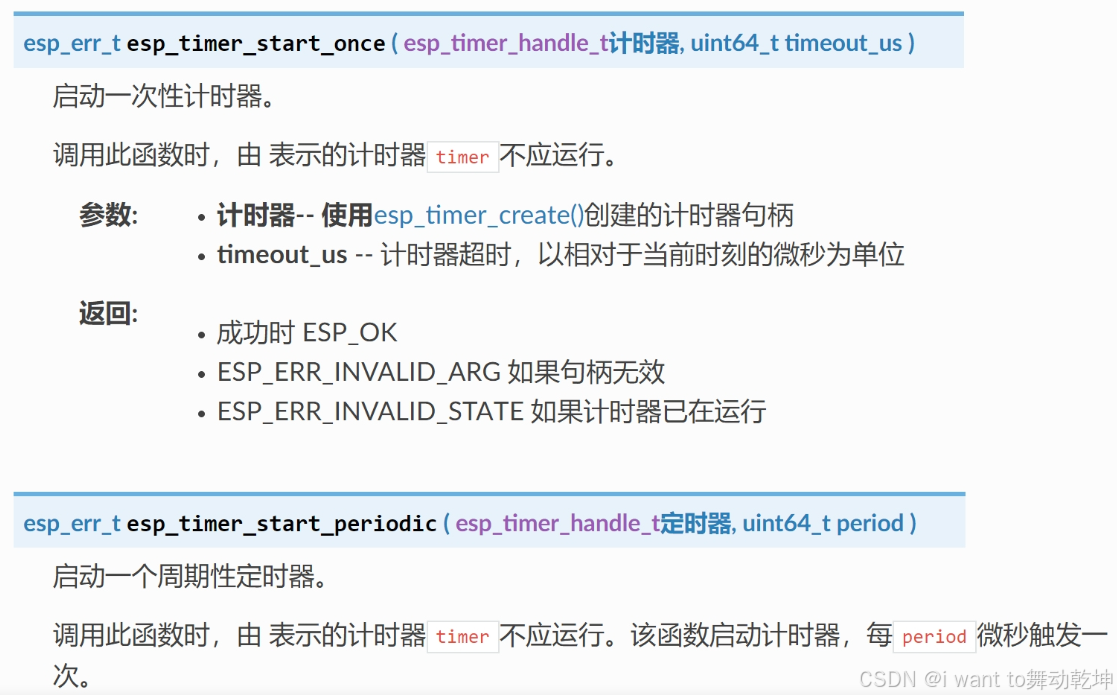
一共有两种启动方式,一种是周期性定时,另一种是一次性定时。
传入的第一个参数是定时器句柄,第二个是启动的时间,单位是微秒。
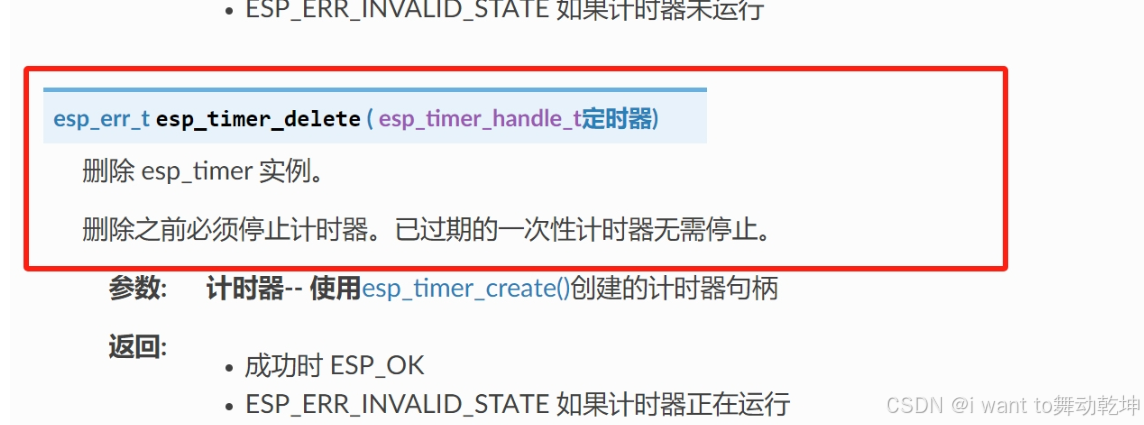
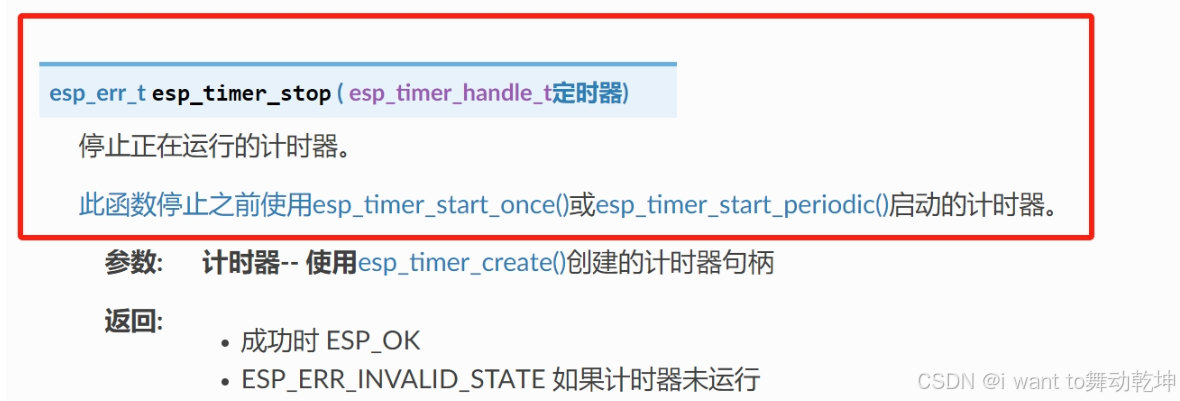
可以看出使用周期性启动和一次性启动后,如果要删除定时器,必须先停止,但停止时不能自己在自己的回调函数中删掉自己
使用esp_timer_stop()可以停止函数
代码编写 mySoftTimer.c
1 2 3 4 5 6 7 8 9 10 11 12 13 14 15 16 17 18 19 20 21 22 23 24 25 26 27 28 29 30 31 32 33 34 35 36 37 38 39 40 41 42 43 44 45 46 47 48 49 50 51 52 53 54 55 56 57 58 59 60 #include <unistd.h> #include "esp_timer.h" #include "esp_log.h" static const char *TAG = "mySoftTimer" ;esp_timer_handle_t timer1 = 0 ;esp_timer_handle_t timer2 = 0 ;#define mySoftTimer_timer1_after_xus_start (5 * 1000 * 1000) #define mySoftTimer_timer2_after_xus_start (1000 * 1000) static void mySoftTimer_timer1Callback (void *arg) ESP_LOGI(TAG, "我只执行一次" ); ESP_ERROR_CHECK(esp_timer_stop(timer2)); ESP_ERROR_CHECK(esp_timer_delete(timer2)); } static void mySoftTimer_timer2Callback (void *arg) static int count = 0 ; count++; ESP_LOGI(TAG, "这时我执行的第%d次,每过%dus执行一次" , count, mySoftTimer_timer2_after_xus_start); } void mySoftTimer_Init (void ) esp_timer_create_args_t timer1_arg = { .callback = &mySoftTimer_timer1Callback, .arg = NULL , .name = "timer1" }; esp_timer_create_args_t timer2_arg = { .callback = &mySoftTimer_timer2Callback, .arg = NULL , .name = "timer2" }; ESP_ERROR_CHECK(esp_timer_create(&timer1_arg, &timer1)); ESP_ERROR_CHECK(esp_timer_start_once(timer1, mySoftTimer_timer1_after_xus_start)); ESP_ERROR_CHECK(esp_timer_create(&timer2_arg, &timer2)); ESP_ERROR_CHECK(esp_timer_start_periodic(timer2, mySoftTimer_timer2_after_xus_start)); }
mySoftTimer.h
1 2 3 4 5 #ifndef _mySoftTimer__H #define _mySoftTimer__H void mySoftTimer_Init (void ) #endif
main.c
1 2 3 4 5 6 7 8 9 10 11 12 13 14 15 16 17 18 19 #include <stdio.h> #include "freertos/FreeRTOS.h" #include "freertos/task.h" #include "esp_log.h" #include "mySoftTimer.h" static const char *TAG = "main" ;void app_main (void ) ESP_LOGI(TAG, "Initializing soft timers..." ); mySoftTimer_Init(); while (1 ) { vTaskDelay(pdMS_TO_TICKS(1000 )); } }
相关链接(侵删)
ESP32 IDF 定时器Timer
=================我是分割线================= 欢迎到公众号来唠嗑:
