Nginx安装并部署VUE
什么是Nginx
一款高性能、轻量级Web服务软件
稳定性高
系统资源消耗低
对HTTP并发连接的处理能力高
单台物理服务器可支持30000~50000个并发请求
Ubuntu如何部署vue项目操作步骤
- 安装nginx。
- 在vue项目的根目录下履行“npm run bulid:prod”打包vue项目。
- 打包完成后会生成一个dist目录,将其上传到服务器中。
- 修改nginx配置文件/etc/nginx/sites-enabled/default,例如:
1
2
3
4
5
6
7
8
9
10
11
12
13
14
15
16
17
18
19
20
21
22
23
24
25
26
27
server {
listen 80;
listen [::]:80;
server_name 127.0.0.1:80; # 服务器域名或IP+端口
root /data/blog/backend/dist; # 打包后的dist目录
index index.html;
location / {
try_files $uri $uri/ @router; # 指向下面的 @router否则会出现 404
}
对应上面的 @router,主要Vue要求其实不是真实路径,没法找到文件,需要重定向到 index.html 中,然后交给路由处理
location @router {
rewrite ^.*$ /index.html last;
}
} - 输入命令重新加载配置文件便可。
1
nginx -s reload
环境
系统:ubuntu20
安装nginx:
可以先创建一个nginx目录,我的目录在 /usr/local/nginx下
一、安装nginx
- 安装依赖
1 | sudo apt-get install gcc zlib1g-dev libpcre3 libpcre3-dev libssl-dev |
- 下载nginx
1 | wget https://nginx.org/download/nginx-1.13.4.tar.gz |
也可以手动下载:nginx官网 :http://nginx.org/en/download.html
解压并进入目录
1
2tar -xvf nginx-1.13.4.tar.gz
cd nginx-1.13.4/编译和安装
1
2
3
4
5./configure
编译
sudo make
编译成功之后,就可以安装了
sudo make install查看nginx版本
1
2
3
4
5
6./configure
进入nginx安装目录
cd /usr/local/nginx/
查看版本
sbin/nginx -v
nginx version: nginx/1.13.4启动【我安装到 /usr/local/nginx目录下了】
1 | sudo /usr/local/nginx/sbin/nginx |
- 启动nginx
进入/usr/local/nginx/sbin目录,输入./nginx即可启动nginx
1 | ./nginx |
- 如果启动报错:nginx: [emerg] bind() to 0.0.0.0:80 failed (98: Address already in use),说明80端口被占用,使用如下命令:
1
fuser -k 80/tcp
关闭nginx
1 | ./nginx -s quit 或者 ./nginx -s stop |
重启nginx
1 | ./nginx -s reload |
查看nginx进程
1 | ps aux|grep nginx |
- 设置nginx开机启动
只需在rc.local增加启动代码即可。按键盘 i 然后在底部增加:1
vim /etc/rc.local
1
2/usr/local/nginx 你的nginx安装的路径
/usr/local/nginx/sbin/nginx
nginx安装完成
安装nginx说明2
- 下载压缩包
下载地址:nginx下载
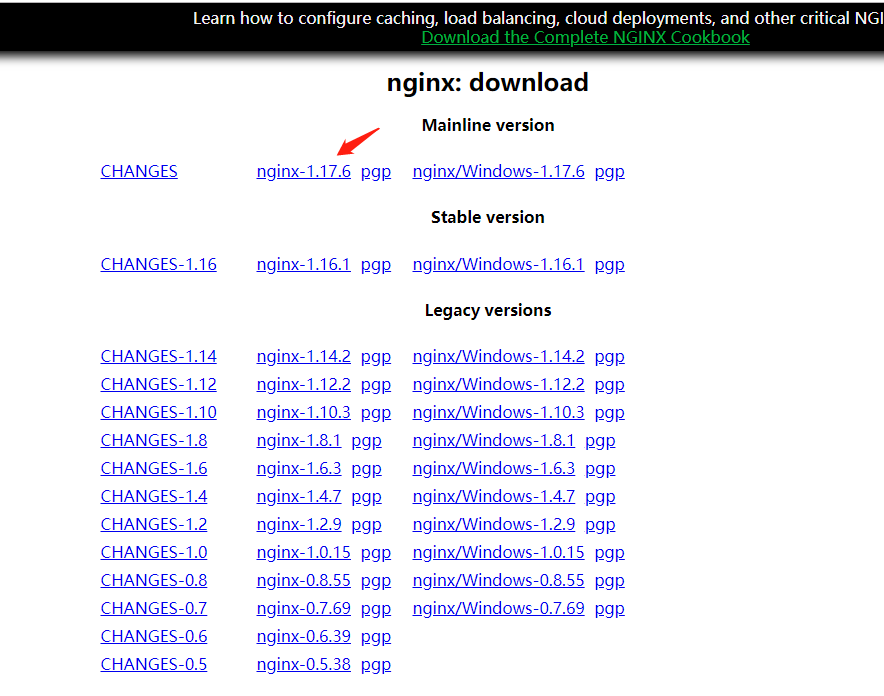
- 解压
1
tar -zxvf nginx-1.17.6.tar.gz
- 安装依赖
进入nginx的安装目录

执行命令后会发现出现错误,很多not found, 我们需要添加依赖库。
1、PCRE库
1
2
3
4./configure: error: the HTTP rewrite module requires the PCRE library.
You can either disable the module by using --without-http_rewrite_module
option, or install the PCRE library into the system, or build the PCRE library
statically from the source with nginx by using --with-pcre=<path> option.安装PCRE:
1
sudo apt-get install libpcre3 libpcre3-dev
2、zlib库
1
2
3
4./configure: error: the HTTP gzip module requires the zlib library.
You can either disable the module by using --without-http_gzip_module
option, or install the zlib library into the system, or build the zlib library
statically from the source with nginx by using --with-zlib=<path> option.
** 解决:**
下载压缩包http://zlib.net/

- 解压缩
1
tar -zxvf zlib-1.2.11.tar.gz
- 进入文件夹中,依次执行
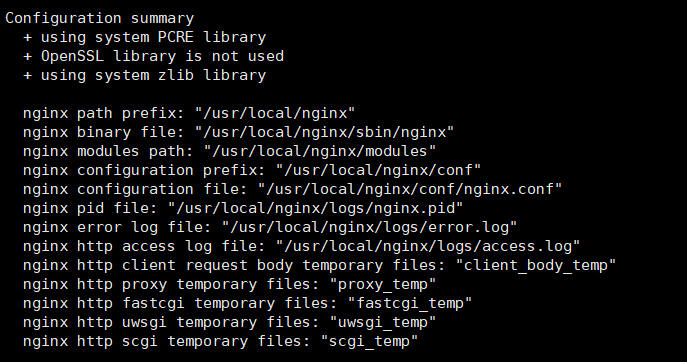
1 | ./configure |
成功,会出现
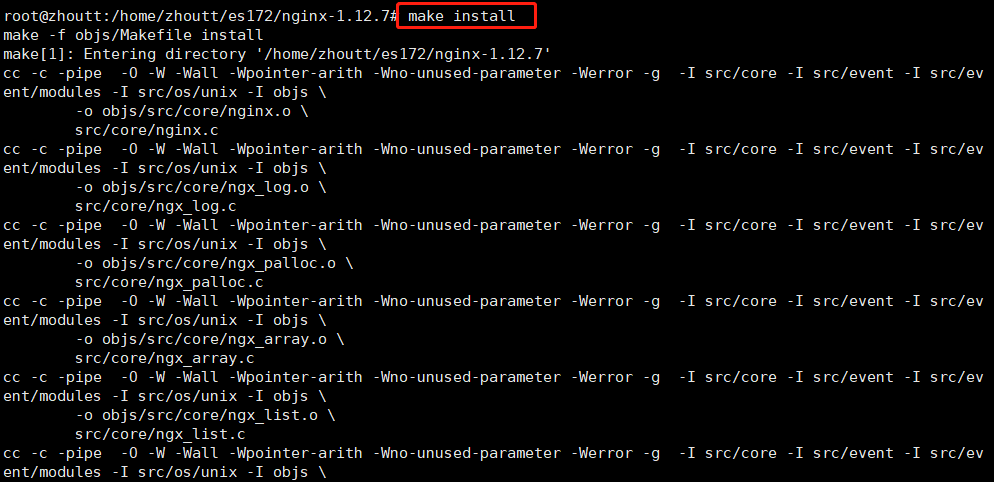
- 安装Nginx
1
make install
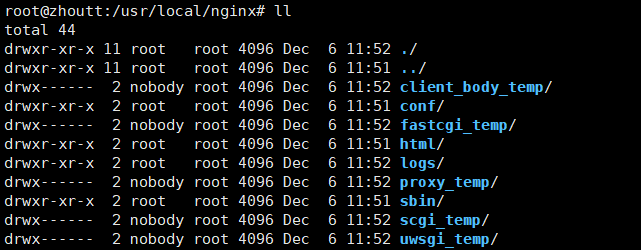
- 1、 查看nginx位置

- 2、进入/usr/local/nginx
- 3、nginx启动命令
1
2
3
4
5
6
7
8
9
10
11
12
13
14
15
16首先进入sbin
./nginx 开启
./nginx -s stop 停止
./nginx -s quit
./nginx -s reload
对 nginx 进行重启相当于先停止再启动,即先执行停止命令再执行启动命令
./nginx -s quit
./nginx
重新加载配置文件
(当修改nginx.conf 修改,要想让配置生效需要重启nginx,使用./nginx -s reload不用先停止nginx再
启动,即可将配置信息在nginx中生效。)
./nginx -s reload
一、编译安装Nginx服务
下载安装包
- 关闭防火墙将nginx所需软件包到/opt目录下
1
2
3
4
5systemctl stop firewalld
systemctl disable firewalld
setenforce 0
nginx-1.12.0.tar.gz

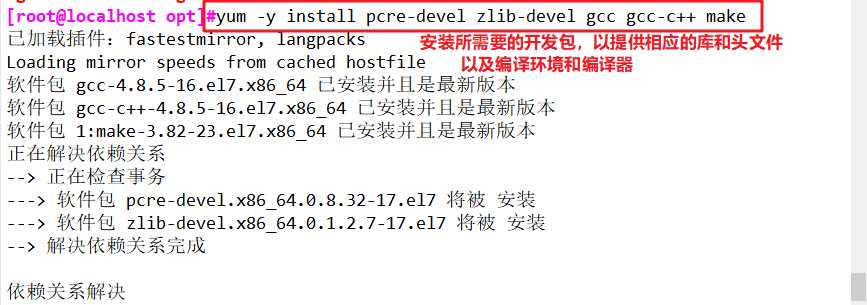
- 安装依赖包
1
yum -y install pcre-devel zlib-devel gcc gcc-c++ make
- 创建运行用户、组
(Nginx 服务程序默认以 nobody 身份运行,建议为其创建专门的用户账号,以便更准确地控制其访问权限)1
useradd -M -s /sbin/nologin nginx

- 编译安装Nginx
1
2
3
4
5
6
7
8
9
10
11
12
13cd /opt
tar zxvf nginx-1.12.0.tar.gz -C /opt/
cd nginx-1.12.0/
./configure \
--prefix=/usr/local/nginx \ #指定nginx的安装路径
--user=nginx \ #指定用户名
--group=nginx \ #指定组名
--with-http_stub_status_module #启用 http_stub_status_module 模块以支持状态统计
make && make install
ln -s /usr/local/nginx/sbin/nginx /usr/local/sbin/ #让系统识别nginx的操作命令

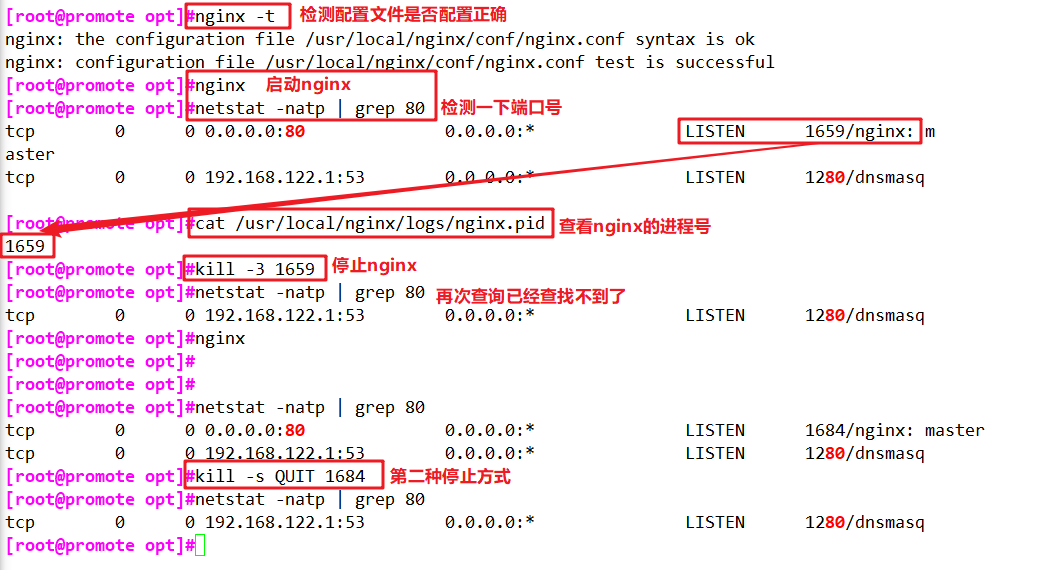
- 检查、启动、重启、停止 nginx服务
1
2
3
4
5
6
7
8
9
10
11
12
13
14
15
16nginx -t #检查配置文件是否配置正确
nginx #启动
cat /usr/local/nginx/logs/nginx.pid #先查看nginx的PID号
kill -3 <PID号>
kill -s QUIT <PID号> #停止
killall -3 nginx
killall -s QUIT nginx
kill -1 <PID号> #重载
kill -s HUP <PID号>
killall -1 nginx
killall -s HUP nginx
日志分隔,重新打开日志文件
kill -USR1 <PID号>
平滑升级
kill -USR2 <PID号>
- 添加 Nginx 系统服务
方法一:
1
2
3
4
5
6
7
8
9
10
11
12
13
14
15
16
17
18
19
20
21
22
23
24
25
26
27
28
29
30
31
32
33
34
35
36vim /etc/init.d/nginx
!/bin/bash
chkconfig: - 99 20
description:Nginx Service Control Script
COM="/usr/local/nginx/sbin/nginx"
PID="/usr/local/nginx/logs/nginx.pid"
case "$1" in
start)
COM
;;
stop)
kill -s QUIT $(cat $PID)
;;
restart)
0 stop
0 start
;;
reload)
kill -s HUP $(cat $PID)
;;
*)
echo "Usage: $0 {start|stop|restart|reload}"
exit 1
esac
exit 0
chmod +x /etc/init.d/nginx
chkconfig --add nginx #添加为系统服务
systemctl stop nginx
systemctl start nginx方法二:
1
2
3
4
5
6
7
8
9
10
11
12
13
14
15
16
17vim /lib/systemd/system/nginx.service
[Unit]
Description=nginx
After=network.target
[Service]
Type=forking
PIDFile=/usr/local/nginx/logs/nginx.pid
ExecStart=/usr/local/nginx/sbin/nginx
ExecrReload=/bin/kill -s HUP $MAINPID
ExecrStop=/bin/kill -s QUIT $MAINPID
PrivateTmp=true
[Install]
WantedBy=multi-user.target
chmod 754 /lib/systemd/system/nginx.service
systemctl start nginx.service
systemctl enable nginx.service


二、认识Nginx服务的主配置文件 nginx.conf
1 | vim /usr/local/nginx/conf/nginx.conf |
- 全局配置
1
2
3
4user nobody; #运行用户,若编译时未指定则默认为 nobody
worker_processes 1; #工作进程数量,可配置成服务器内核数 * 2
error_log logs/error.log; #错误日志文件的位置
pid logs/nginx.pid; #PID 文件的位置

- I/O 事件配置
1
2
3
4
5
6
7events {
use epoll; #使用 epoll 模型,2.6及以上版本的系统内核,建议使用epoll模型以提高性能
worker_connections 4096; #每个进程处理 4096 个连接
}
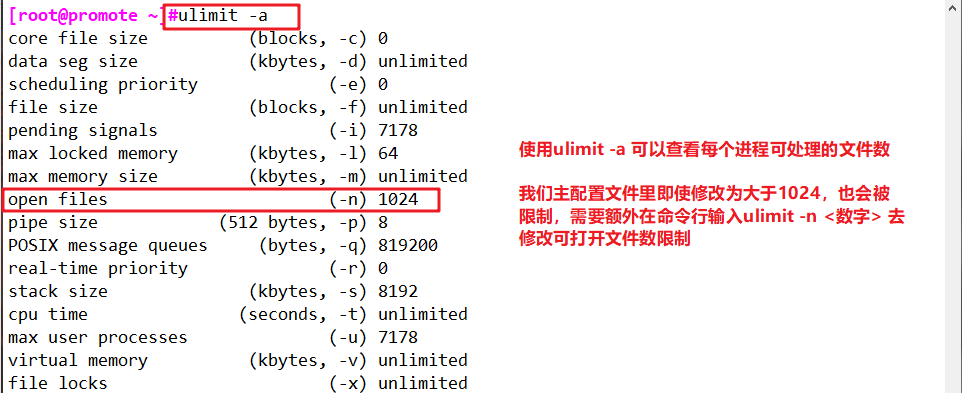
如提高每个进程的连接数还需执行“ulimit -n 65535”命令临时修改本地每个进程可以同时打开的最大文件数。
在Linux平台上,在进行高并发TCP连接处理时,最高的并发数量都要受到系统对用户单一进程同时可打开文件数量的限制(这是因为系统为每个TCP连接都要创建一个socket句柄,每个socket句柄同时也是一个文件句柄)。
可使用ulimit -a命令查看系统允许当前用户进程打开的文件数限制.

- HTTP 配置
1
2
3
4
5
6
7
8
9
10
11
12
13
14
15
16
17
18
19
20
21
22
23
24
25
26
27
28
29
30
31
32
33
34
35
36
37
38
39
40
41
42
43
44
45
46
47
48
49
50
51
52
53
54
55http {
#文件扩展名与文件类型映射表
include mime.types;
#默认文件类型
default_type application/octet-stream;
#日志格式设定
#log_format main '$remote_addr - $remote_user [$time_local] "$request" '
# '$status $body_bytes_sent "$http_referer" '
# '"$http_user_agent" "$http_x_forwarded_for"';
#访问日志位置
#access_log logs/access.log main;
#支持文件发送(下载)
sendfile on;
#此选项允许或禁止使用socke的TCP_CORK的选项(发送数据包前先缓存数据),此选项仅在使用sendfile的时候使用
#tcp_nopush on;
#连接保持超时时间,单位是秒
#keepalive_timeout 0;
keepalive_timeout 65;
#gzip模块设置,设置是否开启gzip压缩输出
#gzip on;
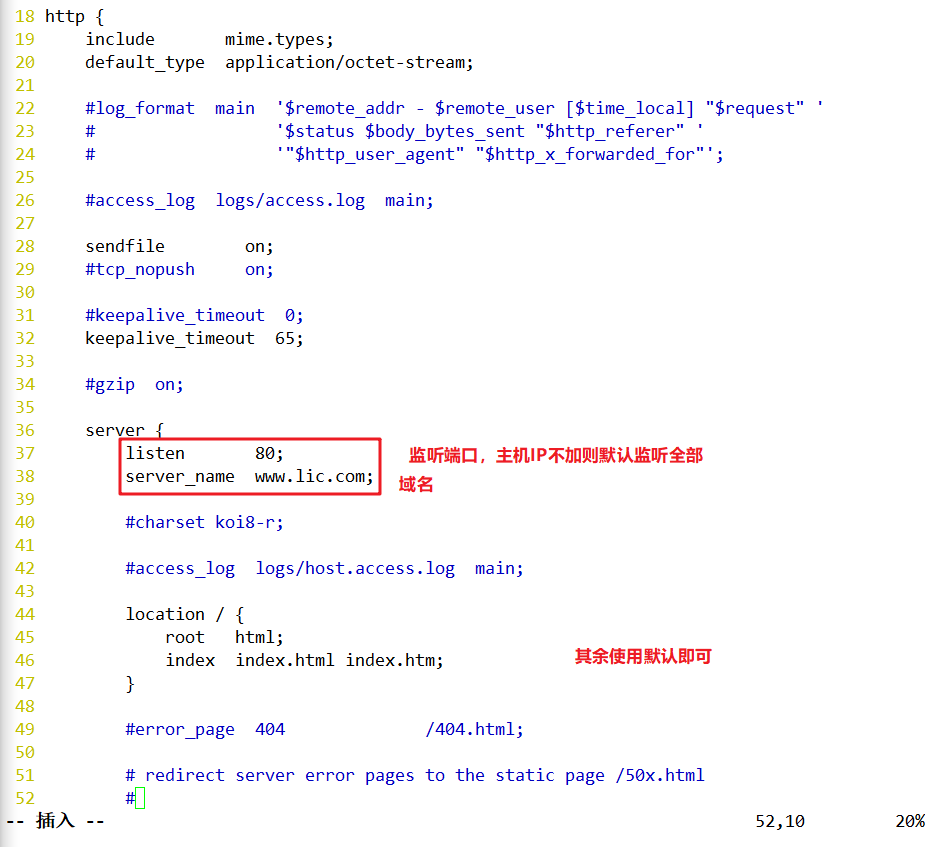
#Web 服务的监听配置
server {
#监听地址及端口
listen 80;
#站点域名,可以有多个,用空格隔开
server_name www.lic.com;
#网页的默认字符集
charset utf-8;
#根目录配置
location / {
#网站根目录的位置/usr/local/nginx/html
root html;
#默认首页文件名
index index.html index.htm;
}
#内部错误的反馈页面
error_page 500 502 503 504 /50x.html;
#错误页面配置
location = /50x.html {
root html;
}
}
}

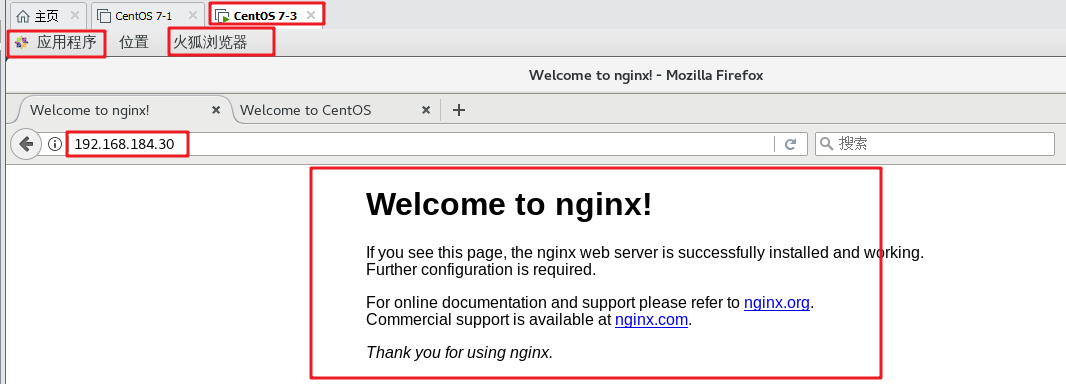
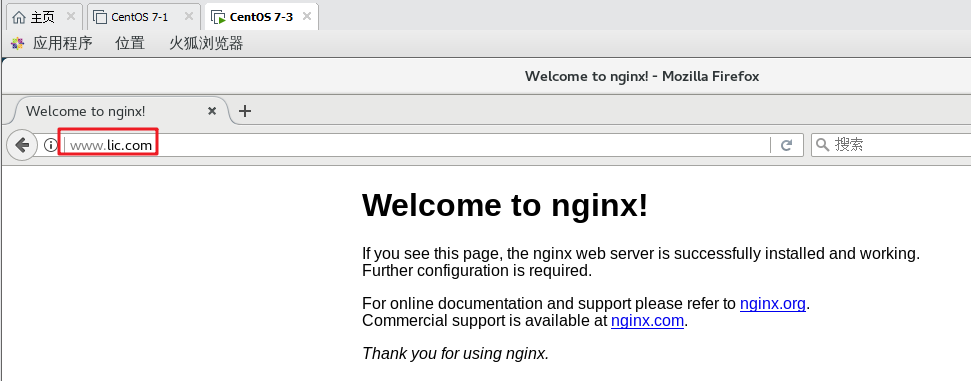
- 日志格式设定:
1
2
3
4
5
6
7
8
9
10remote_addr与$http_x_forwarded_for用以记录客户端的ip地址;
remote_user:用来记录客户端用户名称;
time_local: 用来记录访问时间与时区;
request: 用来记录请求的url与http协议;
status: 用来记录请求状态;成功是200,
body_bytes_sent :记录发送给客户端文件主体内容大小;
http_referer:用来记录从那个页面链接访问过来的;
http_user_agent:记录客户浏览器的相关信息;
通常web服务器放在反向代理的后面,这样就不能获取到客户的IP地址了,通过$remote_add拿到的IP地址是反向代理服务器的iP地址。反向代理服务器在转发请求的http头信息中,可以增加x_forwarded_for信息,用以记录原有客户端的IP地址和原来客户端的请求的服务器地址。
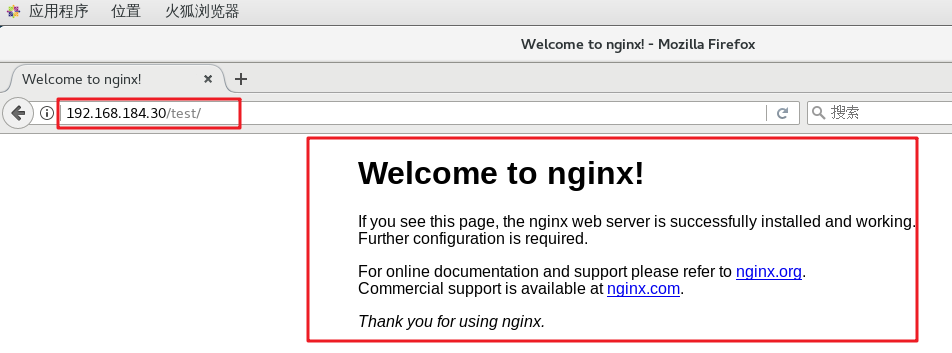
1 | location常见配置指令,root、alias、proxy_pass |


二、部署项目
- 打开vue项目,在控制台输入这是我打包好的:默认会生成一个dist文件
1
npm run build

进入nginx安装目录下,有一个html文件,默认里边有一个index.html文件,删掉
1
rm -rf *
把生成的dist目录下的静态资源传输到服务器

注意:我自己为了方便上传就将这个文件创建了软链接,然后指向了共享文档里了
- 修改配置文件
此外,进入cd /usr/local/nginx/conf目录可修改nginx的配置文件:1
vim nginx.conf
这是我的:
1 | server { |
这样就可以了
记得要开启端口号
- 开放 8080 端口
1、检查防火墙状态
ubuntu
1 | sudo ufw status |
centos
1 | sudo ufw disable |
running 表示防火墙是开启的,如果你看到的是 not running,则表示防火墙关闭,
2、关闭防火墙:
ubuntu
1 | firewall-cmd --state |
3、开放 8080 端口
ubuntu
1 | sudo ufw allow 22 |
centos
1 | firewall-cmd --zone=public --add-port=8080/tcp --permanent |
4、重启防火墙
1 | systemctl restart firewalld.service |
5、重新载入配置
1 | firewall-cmd --reload |
6、重启nginx
在/nginx/sbin/目录下
重启:
1 | ./nginx -s reload |
查看nginx进程:
1 | ps aux|grep nginx |
部署vue前台代码
1、打包前台代码
VScode中执行
1 | npm run start |
在项目的文件夹里有个dist文件夹
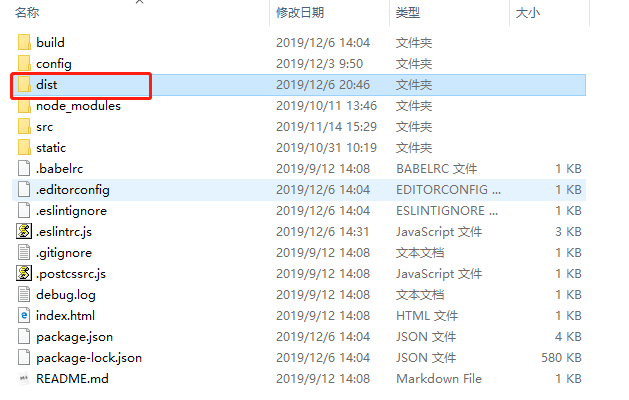
里面的文件,全部复制到/usr/local/nginx/html中


2、修改配置文件
进到conf目录下,有个nginx.conf,先备份(好习惯)
1 | cp nginx.conf nginx.conf.back |
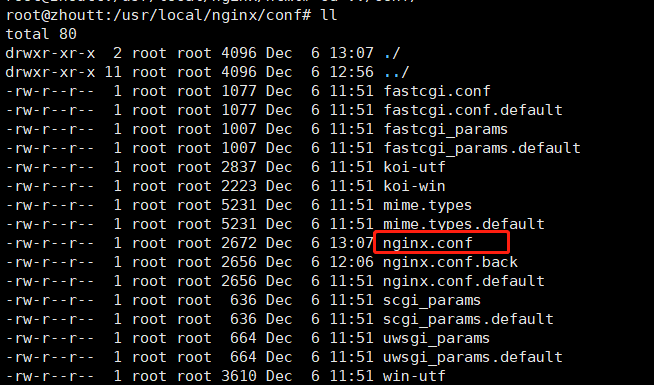
需要修改,
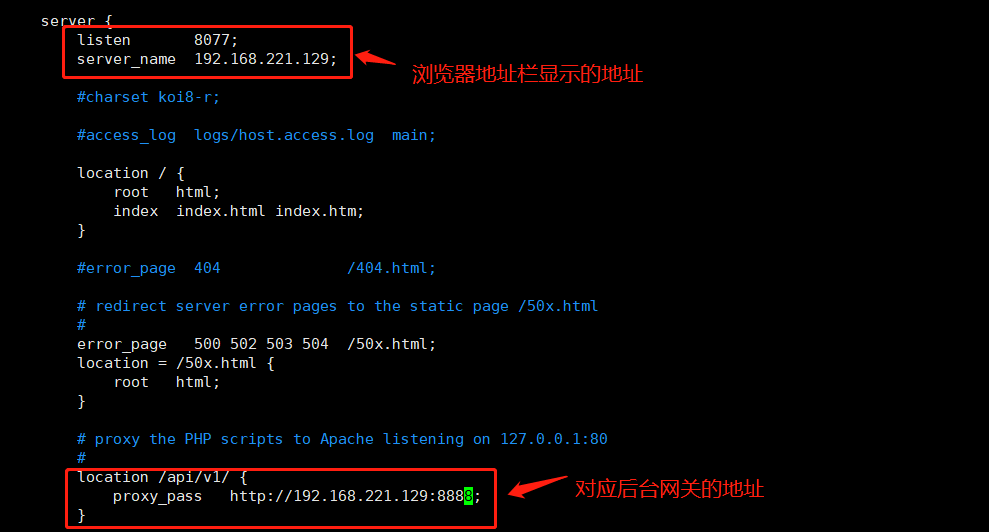
重新加载配置文件即可。
报错解决
404: Connection refused) while connecting to upstream, client: 172.16.54.1, server: localhost, request: “POST /api/accountApi/accoun t/loginAccount HTTP/1.1”, upstream: “http://10.2.0.126:8888/api/accountApi/account/loginAccount”, host: “172.16.5
一般在nginx.conf中配置不对,跨域访问就会出现404,找不到页面的情况:
一般安装我上边跨域配置,就不会出现了。vue项目,npm run build时点击路由切换,第一次点击没问题,再点不会切换报错如下图
Uncaught SyntaxError: Unexpected token ‘<‘

因为在将我的项目(在路由中用了懒加载)改为 history模式的过程中,有时候发现会出现chunk加载出错的情况,打开chrome的network发现那个chunk加载404了,是因为请求的url中多了一层路径。我在这里发现了解决方案。
LinusBorg说,因为在 history模式中切换路由时,我们是真正改变了页面的url路径,所以webpack的runtime会认为它位于 example.com/some/path。如果 publicPath是设置的相对路径,那么webpack加载chunk时可能会变成 example.com/some/path/static/js/3.js这样的路径,然而chunk的真正路径是 example.com/static/js/3.js,所以我们需要将 publicPath设置为绝对路径( publicPath: ‘/’)来解决这个问题。
具体查看:https://www.jb51.net/article/162268.htm 讲解很详细
解决访问:在config.index中加上:
1 | module.exports = { |
完整的:
1 | module.exports = { |
完美解决问题
相关链接
欢迎到公众号来唠嗑:


