Nginx部署前端项目+ 域名配置
Step1:服务器上安装 Nginx
1、安装nginx
1 | Ubuntu |
2、检查nginx是否安装,输入如下命令后若出现版本号则安装成功
1 | nginx -v |
3、启动nginx
1 | systemctl start nginx |
- 注:这里如果出现报错,说明缺少nginx启动相关的依赖,根据报错提示,复制报错提示解决方案的命令,安装相关依赖重新执行上述启动命令即可!
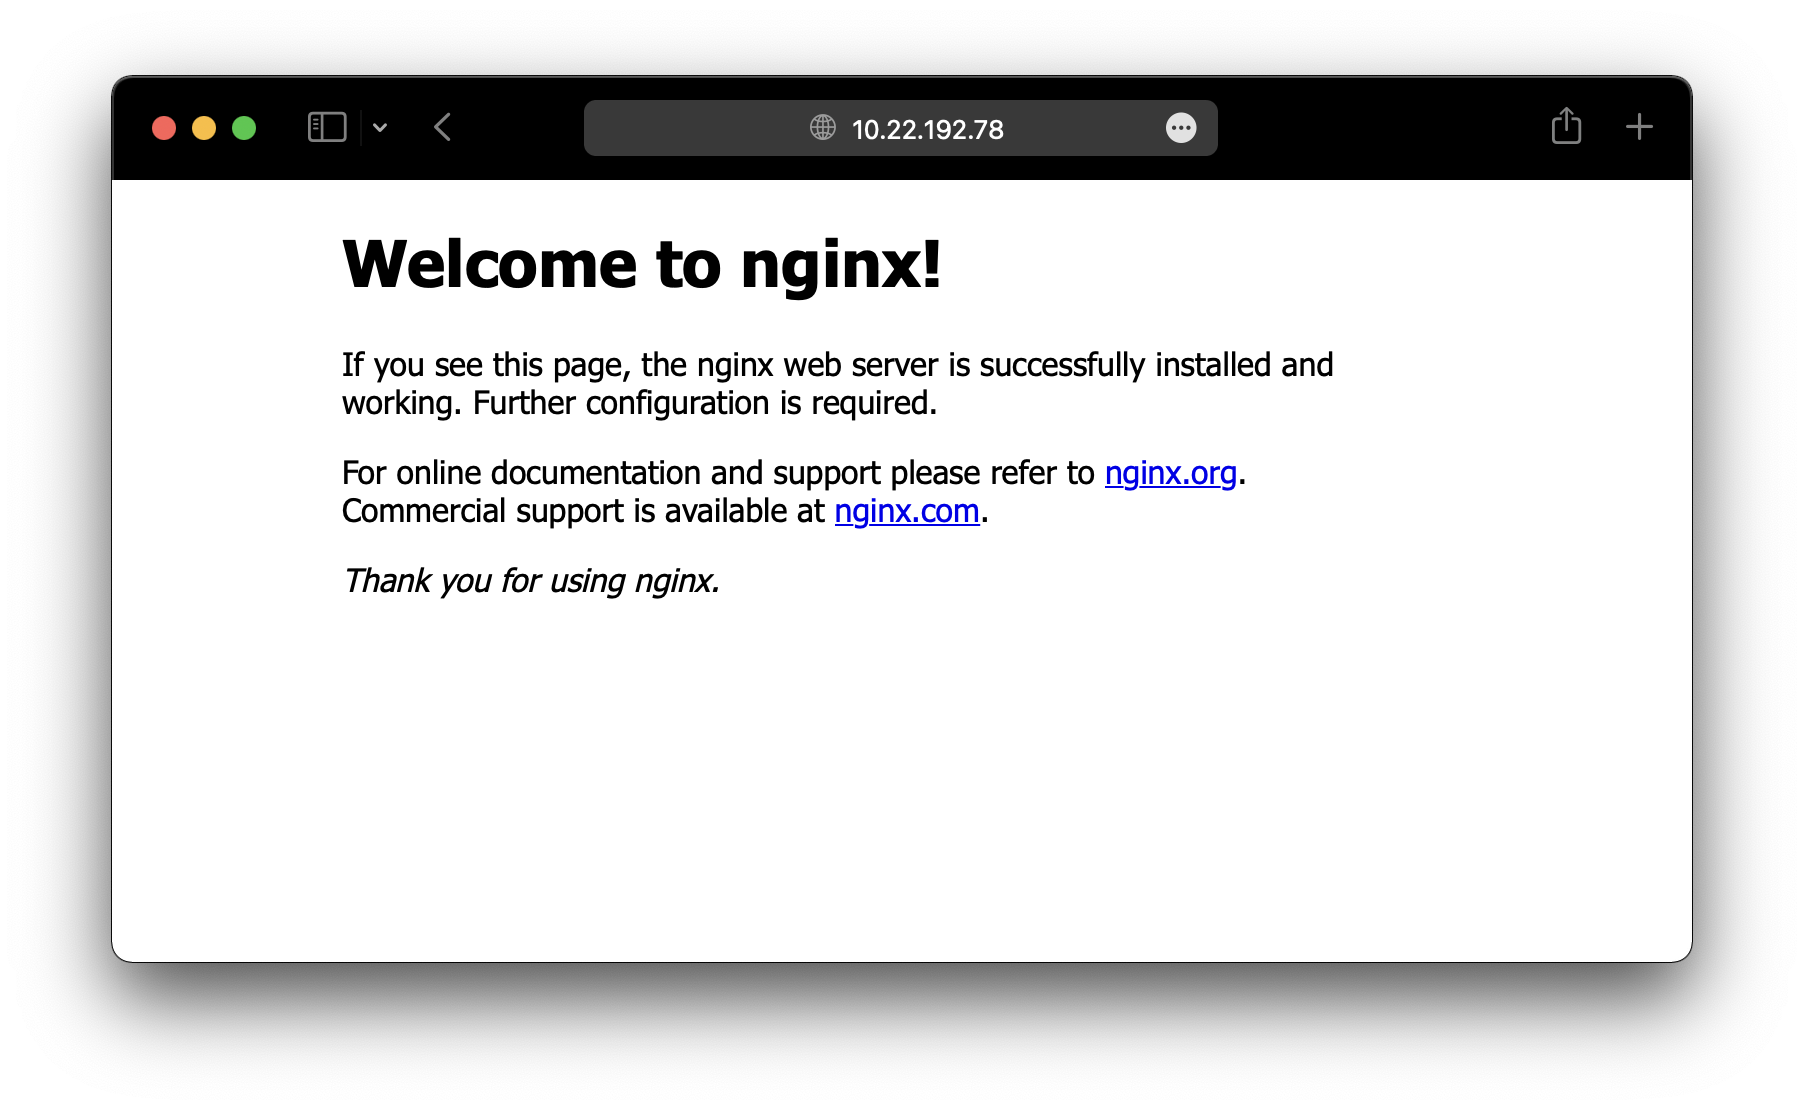
4、在浏览器输入ip地址,若出现如下页面则启动成功
Step2:打包上传Vue项目到服务器
配置
1-1、Vue2项目配置跨域
在 vue.config.js 中进行如下配置:
1 | module.exports = { |
1-2 Vue3+Vite项目配置跨域
在 vite.config.js 中进行如下配置:
1 | server: { |
2、Vue项目打包:
1 | npm run build |
打包完成后,会在项目根目录下自动生成一个默认dist文件夹
3、上传至服务器指定文件夹下
这里我放在服务器的 /root/front_end 文件夹下
上传命令:
1 | scp -r [dist文件夹所在的绝对路径] [服务器用户名]@[服务器IP地址]:[目标服务器文件夹绝对路径] |
以我的举例:
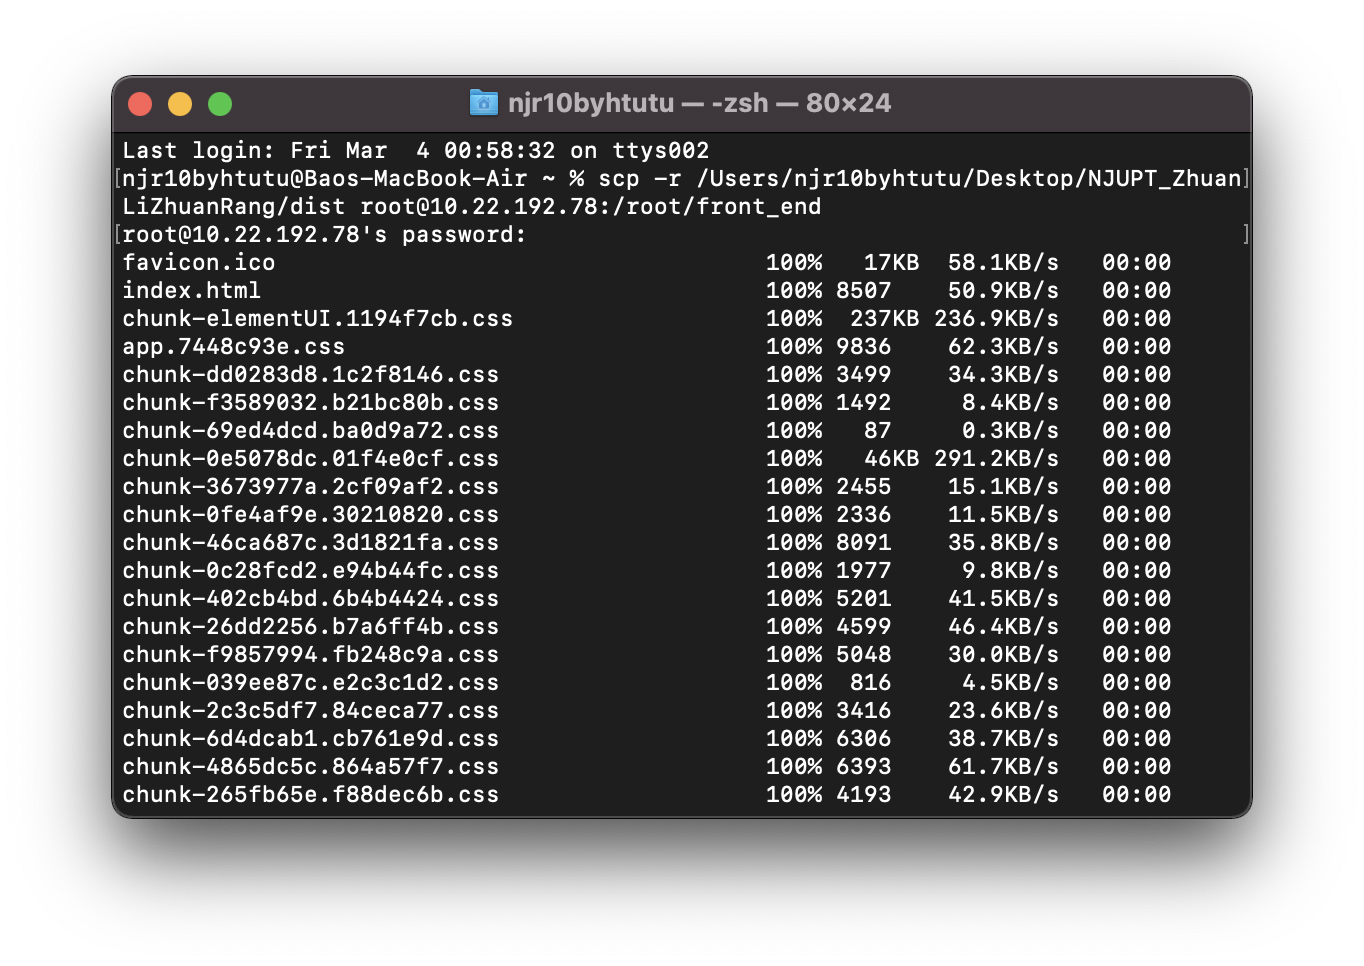
也可以使用 Xftp 向服务器传输文件,Mac用户推荐Termius
Step3:配置 Nginx
在服务器上找到Nginx安装位置
默认在/etc/nginx打开 /etc/nginx
1
cd /etc/nginx
修改nginx.conf
我使用的Vs Code进行文件创建并写入
方法:在Vs Code中安装以下插件,连接至服务器后,打开/etc/nginx

在 nginx.conf 中添加server,内容如下:
1 | server { |
配置完 nginx.conf 后保存,执行
1 | 测试 Nginx 配置以确保没有语法错误 |
如果没有错误,重新加载Nginx以使更改生效
1 | systemctl reload nginx |
- 也可以直接重启nginx
1
systemctl restart nginx
Step4:授权访问服务器中的文件夹
在服务器中打开 dist 所在的文件夹的最上级文件夹(一般是根目录),如:我的 dist 文件夹的绝对路径为 /root/front_end/dist ,那么就打开:
1 | cd / |
输入如下命令授权访问 dist 文件夹:
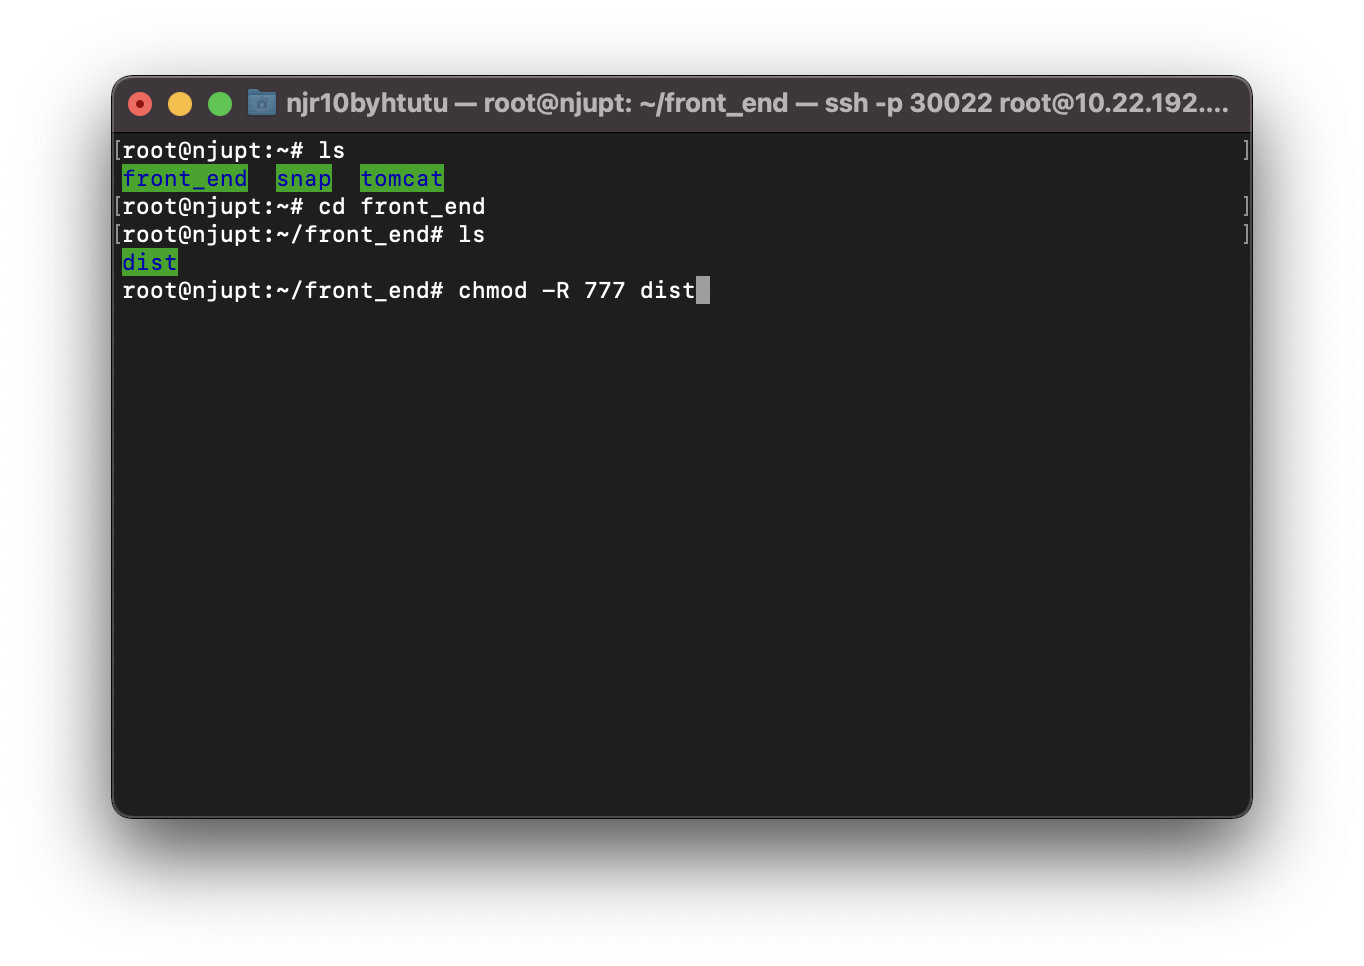
1 | chmod -R 777 /root/ |
Step5:访问已经部署好的Vue项目
在浏览器输入:
服务器IP地址:自己设置端口号/index.html
即可进行访问
Step6:域名配置
在上述 nginx.conf 中添加如下配置:
1 | server{ |
配置本地地址映射域名以及域名转发指定ip
首先安装nginx,参加博客:https://www.cnblogs.com/qfb620/p/5508468.html
按照博客写的访问127.0.0.1查看是否访问成功,成功即安装成功。
下一步就是配置127.0.0.1与域名scc.company.com的映射(也就是访问scc.company.com可以请求到本地指定端口的地址。我的项目在本地的8083端口,配置正确,就能访问到我的项目)
首先,通过switch hosts来添加本地对应域名的映射 127.0.0.1 sct.company.com
下一步,打开nginx.conf
找到server,配置如下
1 | server { |
主要改了下面两个地方
server_name sct.company.com;
location /custom-web/ {
proxy_pass http://127.0.0.1:8083;
}
好了,127.0.0.1对应域名sct.company.com配好了
记得重启nginx,进入到nginx的目录,
输入
1 | nginx -s reload |
进行重启。

没有报错就是重启成功
然后清空浏览器缓存,我是清空了好几次,
又ping了一下sct.company.com,看请求的是不是本地,

可以看到请求的是本地
这个时候,浏览器输入sct.company.com/custom-web/…访问一下项目地址 ,可以看到可以请求到tomcat上面的项目了
=================================分割线=========================================
下面看下重定向,配置如下
1 | server { |
主要是这个代码:
location / {
rewrite ^/(.*)$ http://www.baidu.com/;
proxy_pass http://10.200.4.120:80;
}
nginx -s reload重启nginx
你输入sct.company.com就会跳转到百度
nginx配置文件 通过域名访问
解读Nginx配置文件,通过域名访问tomcat
第一次在linux 服务器上使用nginx 并指向tomcat 目录 通过域名 访问项目。遇到了很多坑,为了让自己更好的学习并吸收知识,特意总结了一下这次的经验。
首先我们需要了解一下nginx的组成部分,想必大家都是对他有所了解。
文件所在的路径是 /usr/local/nginx/conf 文件夹下的nginx.conf。
1 | 第一个原本的配置文件上是注释的,这里指的是nginx的用户权限, |
下面部署nginx 并使其转发到tomcat下的重点在于server这个块。
1 | server { |
下面是location的设置
1 |
|
顺带提一下负载均衡
1 | Nginx 均衡负载的实现 简单提一下 均衡策略 |
设置完配置文件下面就是运行测试了。
- 进入nginx 启动文件的目录 /usr/local/nginx/sbin
- 启动服务 ./nginx (这是在第一次启动时使用,或者进程被杀死时启动。)
- 重启服务 ./nginx -s reload (这是在修改了配置文件的情况下,不需要杀死进程)
- 如果在使用 ./nginx 命令时 linux 报错nginx: [emerg] bind() to 0.0.0.0:80 failed (98: Address already in use)证明这个80端口被nginx占用了,这个时候需要杀死进程 使用killall -9 nginx 或者使用 netstat -apn | grep 80 查询当前80端口 tcp 0 0 0.0.0.0:80 0.0.0.0:* LISTEN 13741/nginx: master 然后使用kill -9 13741命令杀死进程.
- 启动nginx服务器就不会报错,如果配置文件出现错误,下面会显示错误的行号
在浏览器上输入域名,nginx自动在nginx.conf中查找 server_name 对应的域名 的server 下的location跳转到proxy_pass 这里指的的 IP和端口。我这里设置的是8081端口。
注意如果proxy_pass 配置的IP地址和域名解析的IP地址不同会出现
这个问题我是在java代码中使用ajax拦截请求后加入到请求头中解决的。
在nginx上添加下面这几段并没有实际效果。
add_header ‘Access-Control-Allow-Origin’ ‘*’;
add_header ‘Access-Control-Allow-Methods’ ‘GET, POST, OPTIONS’;
add_header ‘Access-Control-Allow-Headers’ ‘DNT,X-CustomHeader,Keep-Alive,User-Agent,X-Requested-With,If-Modified-Since,Cache-Control,Content-Type’;
LINUX安装nginx并绑定域名详细教程
安装依赖包
1
2//一键安装上面四个依赖
yum -y install gcc zlib zlib-devel pcre-devel openssl openssl-devel下载并解压安装包
1
2
3
4
5
6
7//创建一个文件夹
cd /usr/local
mkdir nginx
cd nginx
//下载tar包
wget http://nginx.org/download/nginx-1.13.7.tar.gz
tar -xvf nginx-1.13.7.tar.gz安装nginx
1
2
3
4
5
6
7
8
9
10//进入nginx目录
cd /usr/local/nginx
//进入目录
cd nginx-1.13.7
//执行命令
./configure
//执行make命令
make
//执行make install命令
make install配置nginx.conf
1
2打开配置文件
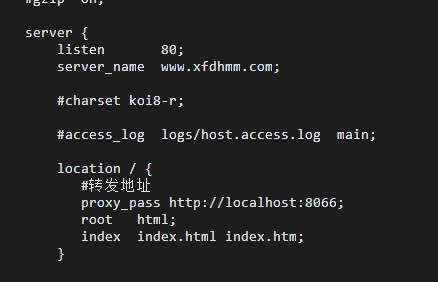
vi /usr/local/nginx/conf/nginx.conf将端口号改成没有被占用的端口(我这里用的是8066),因为可能apeache占用80端口,apeache端口尽量不要修改,我们选择修改nginx端口。
localhost修改为你服务器ip地址。
启动nginx
1
2
3
4/usr/local/nginx/sbin/nginx -s reload
//如果出现报错:nginx: [error] open() "/usr/local/nginx/logs/nginx.pid" failed
则运行: /usr/local/nginx/sbin/nginx -c /usr/local/nginx/conf/nginx.conf再次启动即可!
查看nginx进程是否启动:1
ps -ef | grep nginx
若想使用外部主机连接上虚拟机访问端口(你的服务器ip地址),需要关闭虚拟机的防火墙:
1
2
3centOS6及以前版本使用命令: systemctl stop iptables.service
centOS7关闭防火墙命令: systemctl stop firewalld.service
随后访问该ip即可看到nginx界面。
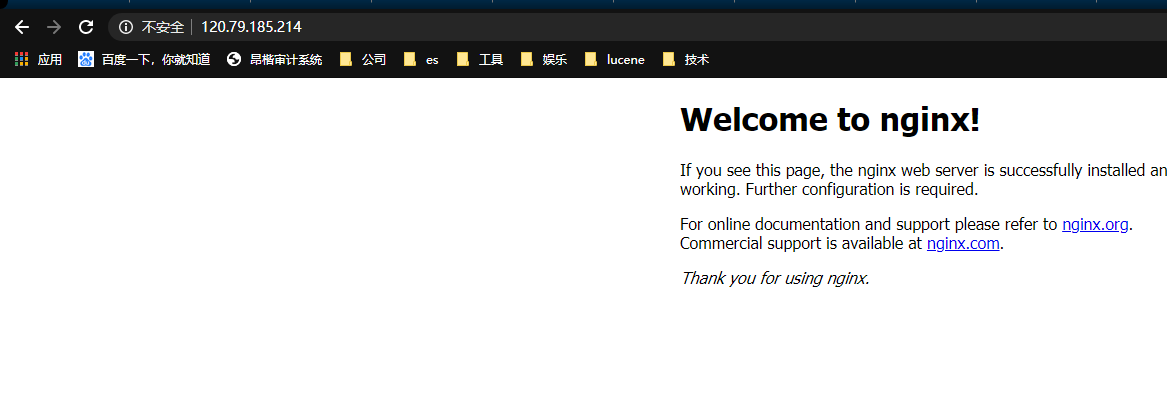
- nginx安装完成后,我们来绑定域名
1
2
打开配置文件
vi /usr/local/nginx/conf/nginx.conf
修改监听端口listen为: 80;
修改server_name为 www.xxxx.com(这里是你的域名);
在下面server标签里添加
1 | location / { |
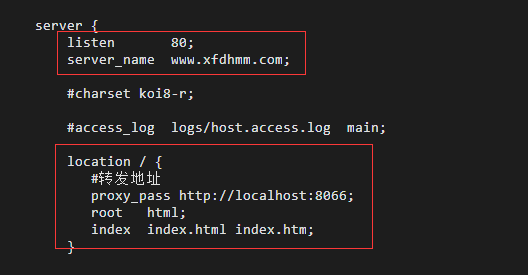
- 然后保存文件,重启nginx,重新访问服务器IP地址,你会发现,你的域名也可以直接跳到你项目的页面

相关链接
欢迎到公众号来唠嗑:


